If you own a Nintendo Switch or Switch Lite, then you’ve probably worried about Joy-Con drift. As your Switch ages, dust and dirt makes its way under the rubber diaphragm protecting the electrical contacts beneath the joystick on your Joy-Con, and the problem is made worse as the contacts are worn down over time. Eventually, you might notice your character or the camera will begin moving by itself in games as the input slowly “drifts” across the screen. Keeping the Switch docked vertically is known to exacerbate the problem.
Buy Gulikit replacement thumbsticks for the Nintendo Switch
Even if your Joy-Con thumbsticks aren’t drifting, there might be reasons to replace them. Aside from preventative care, I’ve found their soft-touch finish wears through quickly; if your thumbsticks consistently feel greasy and seem to trap dust and hair, it’s because oils in your hands have leeched into the plastic.
Gulikit has a solution. The company has become the de facto supplier of Hall Effect joysticks and triggers for game controllers like the 8Bitdo Ultimate, but they also sell their own Kingkong 2 Pro controller and replacement stick kits for the Steam Deck and Nintendo Switch’s Joy-Cons.
What is the Hall Effect?

Credit:
Reviewed / Jonathan Hilburg
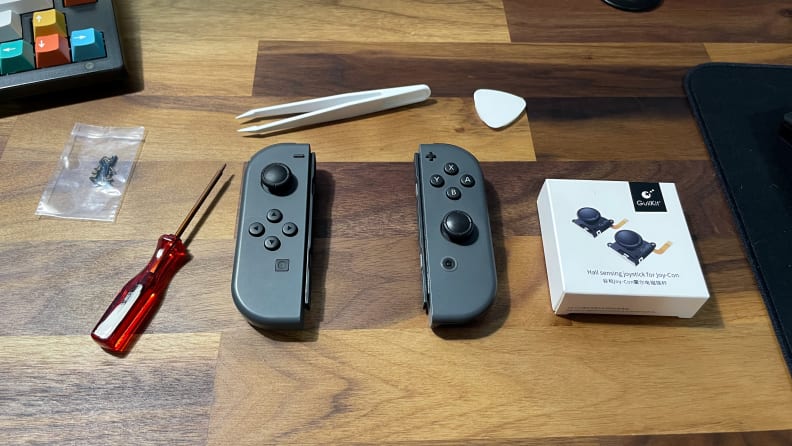
Here’s everything you need to get started on this little project.
Rather than measuring input as the result of mechanical resistance when you tilt a joystick, Hall Effect sensors generate a magnetic field and track the position of the magnet in the stick to record movement. This reduces the number of moving parts, cuts all mechanical strain, and eliminates dead zones (the area in the center of each thumbstick that won’t register input). In addition to their longevity, Hall Effect joysticks also just feel smoother and better overall, in my experience.
If your Joy-Cons are experiencing stick drift, it will be cheaper and more sustainable to replace the faulty sticks rather than spending $80 on a new pair. For $30, the Gulikit package comes with two replacement sticks (featuring detachable caps), and the hardware you need to install them. A pack of four Gulikit replacement sticks costs $70, but frequently goes on sale for around $53.
In addition to their in-depth repair guides, iFixit also sells replacement parts, including a Joy-Con repair kit for $20, or the standalone joystick module for $15. These are analog replacements similar to the original joysticks.
How to replace the Joy-Con thumbsticks

Credit:
Reviewed / Jonathan Hilburg
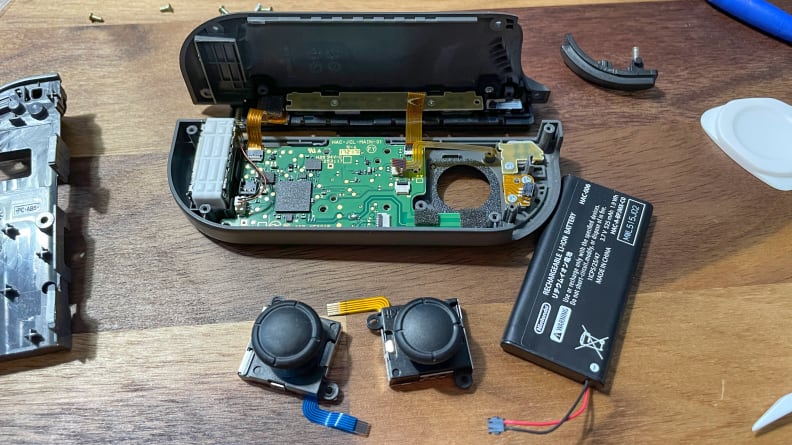
While the process is not for the faint of heart, the difference will be immediately noticeable.
Replacing the thumbsticks in your standalone Joy-Cons is a moderately difficult task; each swap takes about half an hour. Because of the small ribbon cables inside of each Joy-Con, I would only recommend attempting a thumbstick replacement if you already have a baseline level of confidence in tinkering with electronics. The difficulty is comparable to what I experienced upgrading the internal SSD on my Steam Deck—achievable if you’re patient and follow the instructions.
I won’t lay out the step-by-step instructions here because iFixit already has excellent guides for replacing the left joystick and right joystick that cover the process for each in great detail. It’s important that you follow both guides, as each Joy-Con is slightly different from the other. I recommend starting with the left Joy-Con as the process is a bit easier.
Make sure you have a clean work surface and lay out the tools you’ll need. Gulikit’s stick replacement kit includes the appropriate screwdrivers, tweezers, and a wedge tool, but I also used the all-purpose opening tool from this $10 iFixit package to help un- and reseat cables. (It’s handy to have around if you plan on doing any more of this DIY tinkering in the future.) Be sure to organize the screws and components you remove and place them somewhere nearby where they won’t get lost, like a magnetic tray. Finally, remember to go slowly and be gentle with the fragile ribbon cables inside of each Joy-Con—it’s easy to rip them out by accident.
Replacing the joysticks in the Switch Lite is a totally different ballgame. That can take upwards of two hours as you need to remove the device’s heatsink (and reapply thermal paste when you’re putting everything back together) and pull out the entire motherboard. It’s labor intensive, but if your thumbsticks are drifting, or if you need to get inside your Switch Lite to salvage it after a spill, it is possible.
How do they feel?

Credit:
Reviewed / Jonathan Hilburg / Nintendo
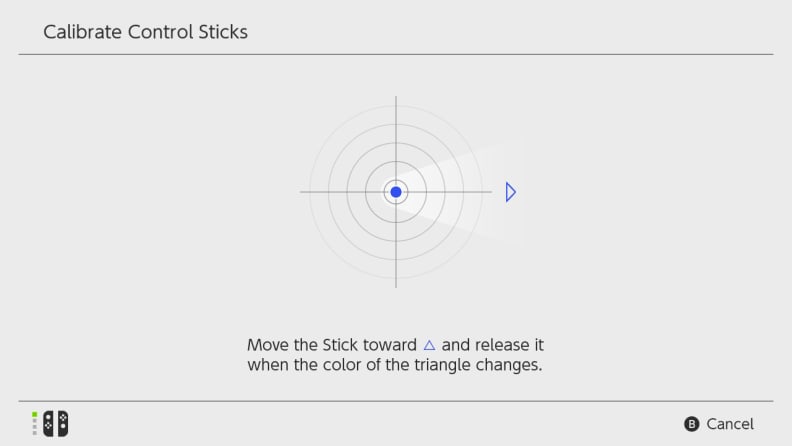
Don’t forget to use the calibration screen located in your Switch’s settings menu.
Once the replacement is complete, the thumbsticks need to be calibrated. Nintendo has an easy guide for doing so. Simply go to the System Settings menu, and navigate to the Controllers and Sensors section. Scroll down to the option for calibrating control sticks, hit X to recalibrate a stick, and follow the on-screen prompts. Repeat for the second thumbstick, and you’re all set. The Switch will even recognize the newfound lack of dead zones.
The improvement will be immediately noticeable. The Gulikit thumbsticks I used feel smoother and more responsive in games, while the click of each is satisfyingly loud and tactile—the stock sticks now come off as mushy and dull. I had no trouble inching Mario along ledges in Super Mario Odyssey, and driving in Mario Kart 8 is smooth and responsive. The upgrade is also a boon for 2D indie titles that require pixel-perfect precision, such as Hollow Knight, Enter the Gungeon, Hades, or Cuphead.
The end result feels sturdy and durable, and the ability to replace the caps means you can swap them out if they become damaged or unsalvageable. Although the Gulikit replacement sticks bounce in and out of stock due to their popularity, if you want to replace the thumbsticks in your Joy-Cons, they’re well worth the wait.
The product experts at Reviewed have all your shopping needs covered. Follow Reviewed on Facebook, Twitter, Instagram, TikTok, or Flipboard for the latest deals, product reviews, and more.
Prices were accurate at the time this article was published but may change over time.


