Expert’s Rating
Pros
- Ultra-powerful spotlight
- Easy hardware installation
- Super affordable
Cons
- Subscription required to view a live feed for more than 5 minutes, record and store video, and enable person detection
- Limited flexibility when it comes to aiming its camera and floodlights
- Industrial design trails Nest and Ring
Our Verdict
Blink’s floodlight cam offers run-of-the-mill video resolution, but extremely bright outdoor lighting and an amazingly affordable price tag. You’ll need a subscription to record video to get the most value from it, but those plans are affordable.
Best Prices Today: Blink Wired Floodlight Cam
$99.99
Combining a floodlight with a security camera isn’t a new concept, but Amazon-owned Blink is the first manufacturer to offer one that’s this affordable. Blink’s smart home ecosystem isn’t as robust as Ring’s or Nest’s, but the company does have a full array of complementary video doorbells and security cameras that can work together.
And the Blink Wired Floodlight Camera came along at just the right time in my life.
The Blink Wired Floodlight Camera’s best feature is easily its $100 price tag.
Long story short: A raccoon recently broke into the area under my house, ripped a hole in the insulation in the floor above, and promptly moved into this cozy crawlspace. I worked with a pest control company to set up a humane trap, but checking this trap daily meant a painful slog through the area beneath the house, invariably resulting in seeing the empty trap before turning around and going back the way I came.
This review is part of TechHive’s in-depth coverage of the best home security cameras.
Solution: I set up the Blink Wired Floodlight Camera to keep an eye on this space in real time, ensuring I would be alerted if the trap was sprung while also providing some illumination should I need to venture into the area in person. I used the camera pretty much nonstop for about two weeks, and I was able to really put the device through its paces.
As the name suggests, this is a wired camera that requires permanent electrical wiring, including a neutral wire, to operate. You can replace an existing light mounted on a standard 4-inch electrical box, or you can have an electrician install a new one.

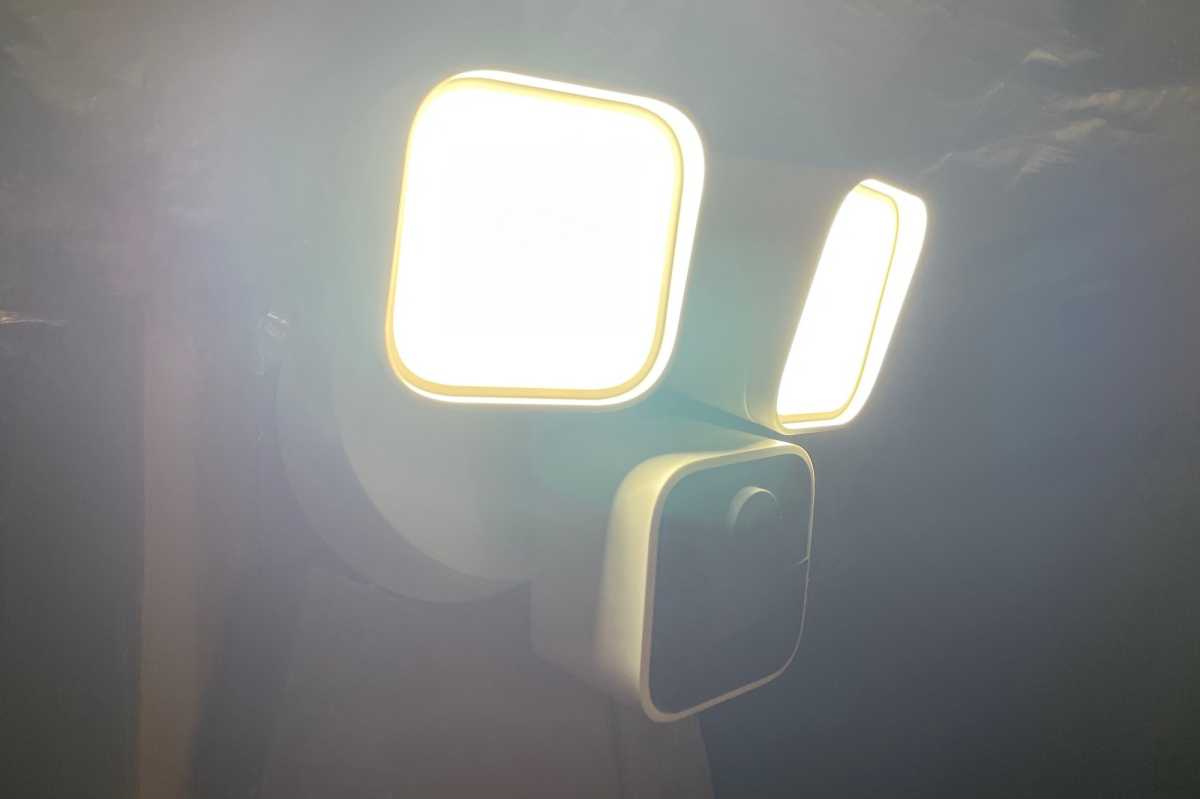
The Blink Wired Floodlight Camera is outfitted with extremely bright floodlights.
Christopher Null/Foundry
The camera itself is a 1080p model with a 143-degree diagonal field of view. Two large spotlights provide 2,600 lumens of illumination (at a cool color temperature of 5000K). Each of the three components is independently aimable, but only modestly so; for the most part, you’ll be looking straight ahead and down at an angle. The hardware isn’t unattractive, but it lacks the sophistication that you’ll find in competing—and more expensive models—from the likes of Eufy Security, Nest, and Ring.
All the usual features are here, including two-way audio, a loud 105dB siren, and infrared night vision for use when the floodlights aren’t on. Connectivity is via 2.4GHz Wi-Fi and the camera is managed through the Blink app. Since this is an Amazon product, Alexa compatibility is strongly pushed, but you’ll need an Alexa-powered smart display to make the most of it.
Hardware setup is surprisingly straightforward. You’ll need to install Blink’s own metal mounting bracket in place of anything that’s already on your electrical box, as the bracket has a permanently mounted bolt at its center. The Blink camera unit mounts directly on this bolt. You simply screw a special nut onto the bolt to hold everything in place with just one connector. It’s an elegant solution that’s much easier to complete than most of these types of installations. To power it up, three wires attach via standard wire nuts to your in-wall wiring.

You’ll need a Blink subscription plan if you want to view a live stream from the camera for more than 5 minutes or if you want to record video at any time. Fortunately, those subscriptions are very affordable.
Christopher Null/Foundry
With the hardware in place, it’s time to turn to software setup, which is quite overdone—I spent more time setting up the software than I did installing the hardware. This is due to Blink walking you through page after page of questions—especially if you want to connect it to Alexa at this time. The app also crashed once during the Wi-Fi connection portion of the experience, which set me back even further.
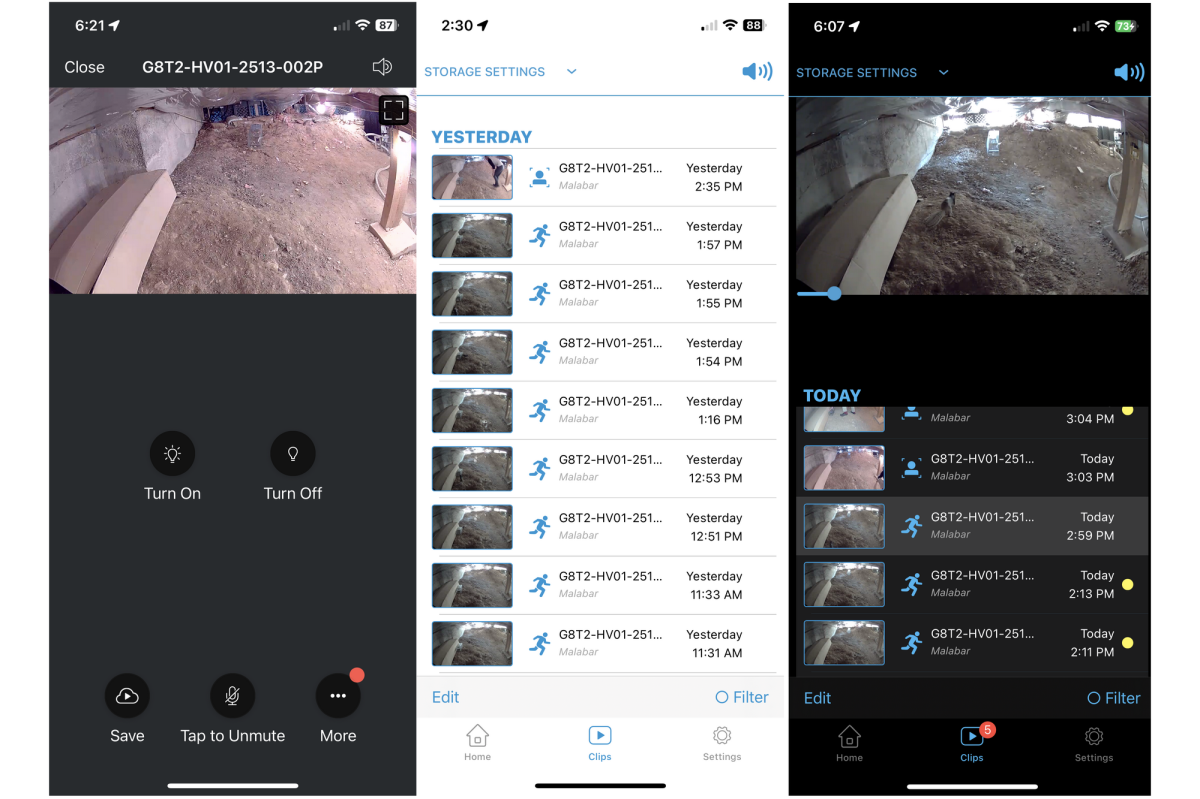
Ultimately, none of this was too difficult, and eventually I got everything configured properly, at which point I was able to start working with the camera and the Blink app in earnest. The app’s primary interface is surprisingly basic, offering a static shot from the camera’s field of view. Tap the camera icon and you’re presented with a handful of functions. The spotlight can be manually toggled on or off here, and you can manually start video recording. There are also buttons for snoozing motion-activated recording and for disabling person detection.
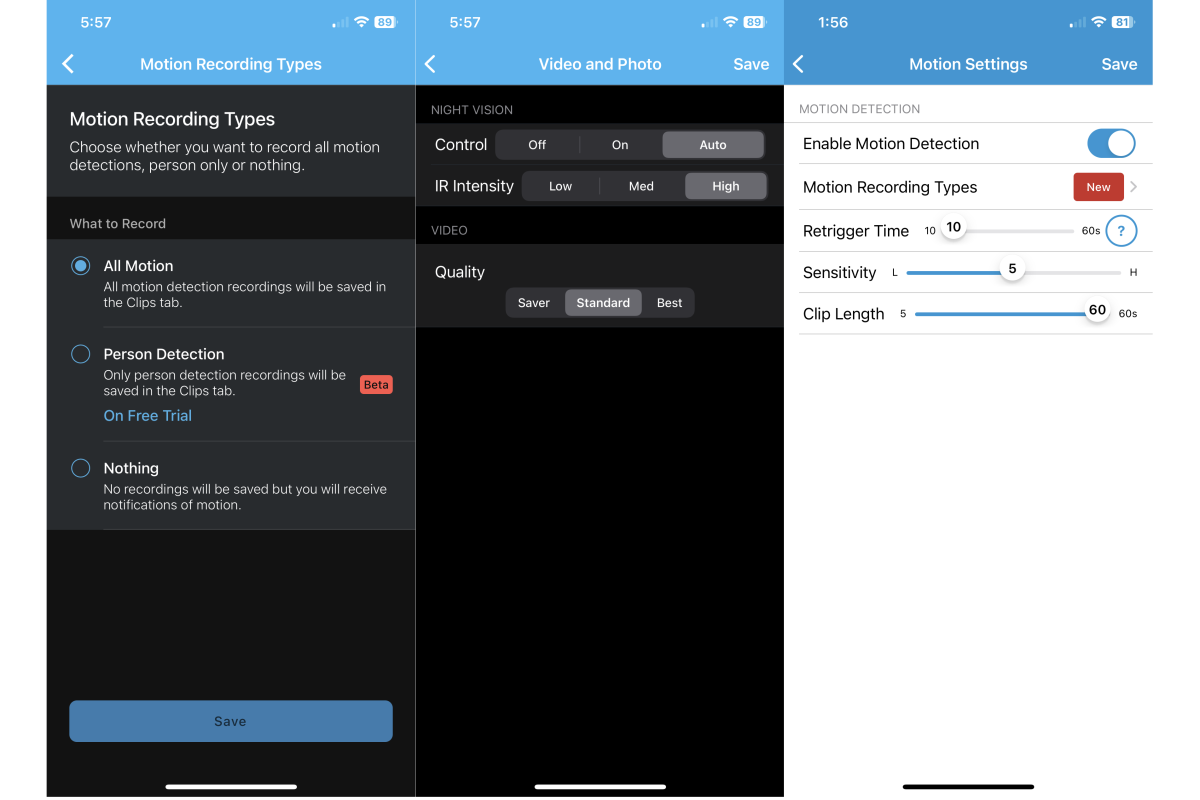
You’ll need to drill down to reach more advanced settings. I spent most of my time with “motion settings,” where you can configure maximum clip length (from 5 to 60 seconds); retrigger/cooldown time (10 to 60 seconds); whether to record on all motion or just people detection; and, critically, sensitivity settings. I spent an eternity trying to fine-tune sensitivity: A value of 9 (out of 10) was too hair-trigger, but 7 missed almost everything. I ended up setting it on 8, which gave me an excellent, regular look at the goings-on under my house, including two rambunctious squirrels that were also making a home down there.

Although it’s currently in beta, you can set the Blink Wired Floodlight Camera to record video only if a person is detected.
Christopher Null/Foundry
Other settings, including the brightness of the floodlights, infrared sensitivity, speaker volume, and a setting that lets you automatically turn on the floodlights at night, are all also available, but I found the default values worked well for all of these. Speaking of the floodlights, they are incredibly bright, a bit more powerful than the 2,400 lumens offered by competing cameras from Nest and Ring, but not quite as powerful as the triple-light Eufy Floodlight Cam 2 Pro, which puts out 3,000 lumens. I mostly kept the brightness at the 50-percent default, and it was more than enough to blind me when I had work to do on the ground.
Recordings are found on the Clips page, which is a monolithic collection of thumbnails stretching back into the past. There’s no timeline to scrub, and it wouldn’t be overly useful anyway, since you can’t set the Blink to record 24/7; it exclusively records on detected motion or manual recording. It’s relatively easy to find what you’re looking for without too much searching on this page, and if you have a surfeit of clips to skim through, you can also set them all to “viewed” with a quick tap. Clip quality is good enough but not great—and it’s less great when in infrared mode; I’d recommend using the highest quality setting if you find the clips aren’t up to snuff.
Blink pushes its cloud storage service pretty heavily during setup, and with a 30-day free trial (no credit card required) there’s no real reason not to try it. The service is fairly cheap at $3 per month or $30 per year for one device; or $10 per month or $100 per year for an unlimited number of Blink devices. The plan not only stores videos online for 60 days, it also extends live view streaming from a miserly 5 minutes to 90 minutes, improves access speed to clips, and enables the camera’s person-detection feature.
If you’re not using the cloud service, you’ll need the $35 Blink Add-On Sync Module 2, which connects wirelessly to your network; and a USB thumb drive to store clips offline. For most users, the cloud service will be the better deal.
That’s extra good news on top of the best feature of the camera: Its price. At just $100, it’s half the price of Ring’s camera, $150 less than Nest’s, and $200 less than Eufy’s. If you have even a passing interest in the Alexa ecosystem, it’s definitely worth considering.
As for the raccoon, we did finally catch it. Turns out it was a skunk.


